Home to training index page > Business Process Model and Notation (BPMN) trainings > Introduction to Diagrams.net trainings
What is Diagrams.net?
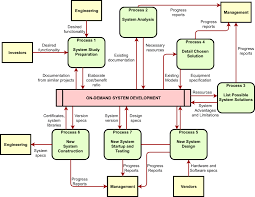
Diagrams.net is a free and open-source online diagramming tool that allows users to create a wide range of diagrams, including flowcharts, network diagrams, organization charts, UML diagrams, and more. In this guide, we will provide an overview of how to use Diagrams.net, including creating new diagrams, adding and editing shapes, and exporting your diagrams.
Creating a New Diagram:
- Go to the Diagrams.net website: https://www.diagrams.net/
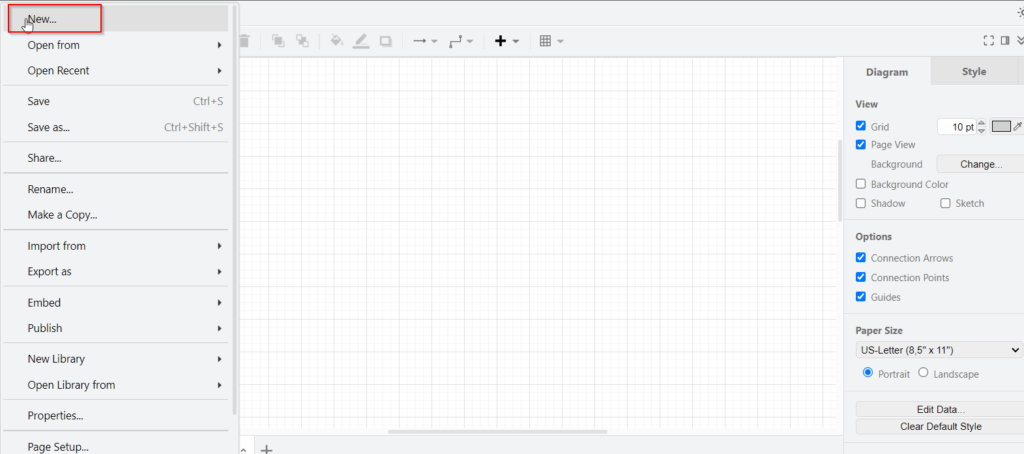
- Click on the “Create New Diagram” button
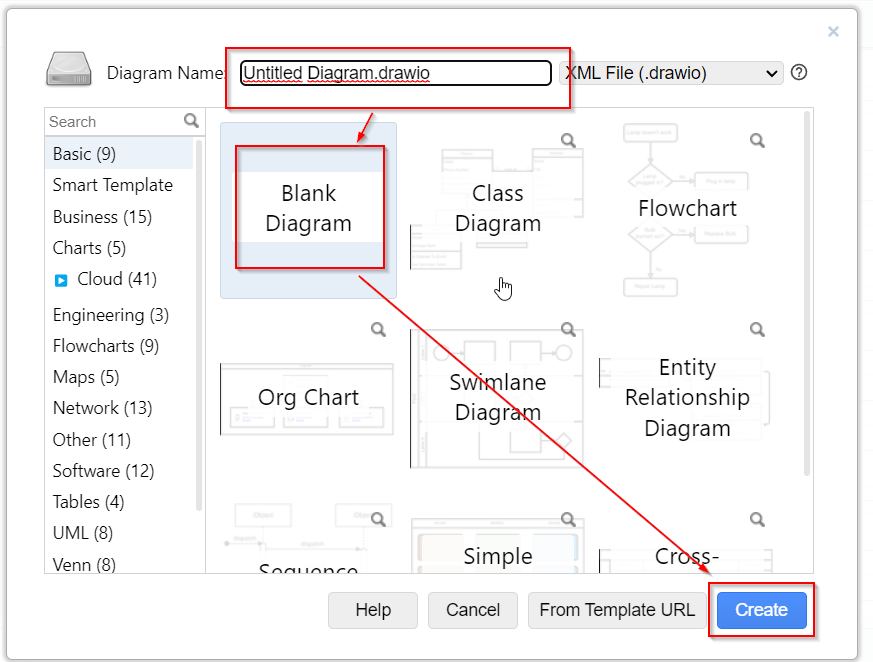
- Choose the type of diagram you want to create or select “Blank” to start from scratch
- Name your diagram and click “Create”
In addition to creating diagrams from scratch, Diagrams.net also offers a variety of templates to help you get started quickly. These templates include pre-designed shapes and layouts for different types of diagrams, such as flowcharts, network diagrams, and organizational charts. This guide will walk you through the process of creating a diagram using a template in Diagrams.net.
Creating a Diagram Using a Template:
- Go to the Diagrams.net website
- Click on the “Create New Diagram” button
- Select “Template” from the dropdown menu
- Choose the type of diagram you want to create from the list of templates
- Name your diagram and click “Create”
Adding and Editing Shapes in Diagrams.net:
- To add a shape to your diagram, select it from the left-hand sidebar and drag it onto the canvas
- To edit the properties of a shape, double-click on it and adjust the settings in the Properties panel
- To add text to a shape, select it and start typing. You can also adjust the font, size, and color in the Properties panel.
Connecting Shapes in Diagrams.net:
- To connect two shapes, select the “Connector” tool from the left-hand sidebar
- Click on the first shape, then drag the cursor to the second shape and release
- Adjust the properties of the connector in the Properties panel
Exporting Your Diagram in Diagrams.net:
- To export your diagram, click on the “File” menu and select “Export As”
- Choose the format you want to export to (e.g., PNG, PDF, SVG)
- Name your file and choose where you want to save it
- Click “Export”
Diagrams.net Trainings:
To become proficient with Diagrams.net, we recommend practicing creating different types of diagrams, experimenting with different shapes and connectors, and exploring the various settings in the Properties panel. You can also watch tutorial videos or read the documentation on the Diagrams.net website to learn more about specific features and functions.
Tips:
- Use keyboard shortcuts to speed up your workflow. For example, press “M” to select the Rectangle tool, “V” to select the Select tool, and “C” to select the Connector tool.
- Use the grid and snap-to-grid features to help align shapes and connectors.
- Save your work frequently by clicking on the “Save” button or using the keyboard shortcut “Ctrl+S” (Windows) or “Cmd+S” (Mac).
- Use the “Arrange” menu to adjust the stacking order of shapes and connectors.
If you need assistance with real-life scenarios or recommendations, please feel free to contact us either HERE or through email at trainings@micro2media.com.
Related Content
- diagrams.net Desktop
- Looking ahead to 2023: AI, machine learning, RTLS and robotic process automation
- diagrams.net (draw.io)
- SourceForge – Diagrams.net mirror project
- Alternative: LucidChart