Home to training index page > Information Technology (IT) trainings > JIRA basis trainings
What is JIRA?
JIRA is a popular issue tracking and project management software developed by Atlassian. Furthermore, it is designed to help teams plan, track, and manage their work more efficiently. JIRA can be used for a variety of tasks, including project management, bug tracking, issue tracking, and agile software development. Moreover, in this user guide and training, we will explore the key features and functionalities of JIRA, along with best practices and examples.

Getting Started with JIRA
To get started with JIRA, you will first need to sign up for an account. You can do this by visiting the Atlassian website and selecting the JIRA option. Once you have created an account, you can log in and begin using JIRA.
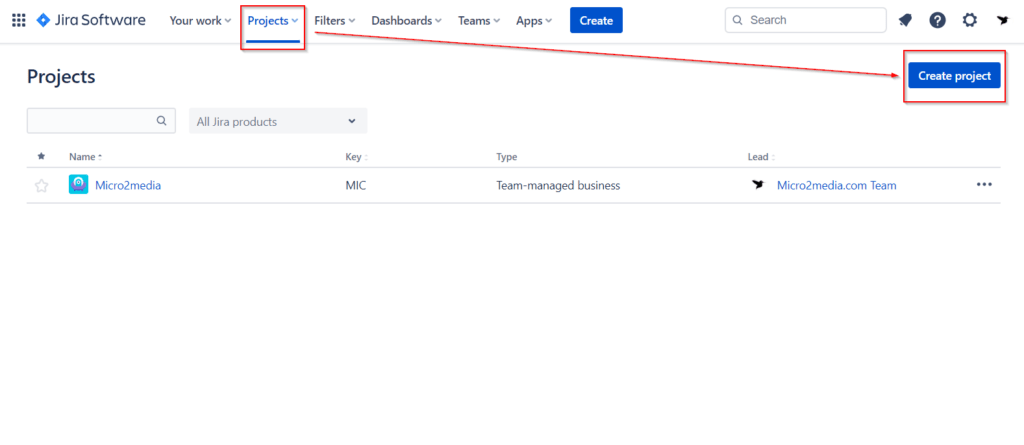
Creating a Project in JIRA
Note that the first step in using JIRA is to create a project. To do this, follow these steps:
- Log in to your JIRA account.
- Click on the “Create” button in the top navigation menu.
- Select “Project” from the drop-down menu.
- Choose the type of project you want to create. JIRA supports several project types, including agile, basic, and service desk.
- Enter a name and key for your project.
- Choose a project lead and assign team members.
- Configure your project settings, such as project roles, permissions, and workflows.
- Click “Create” to create your project.
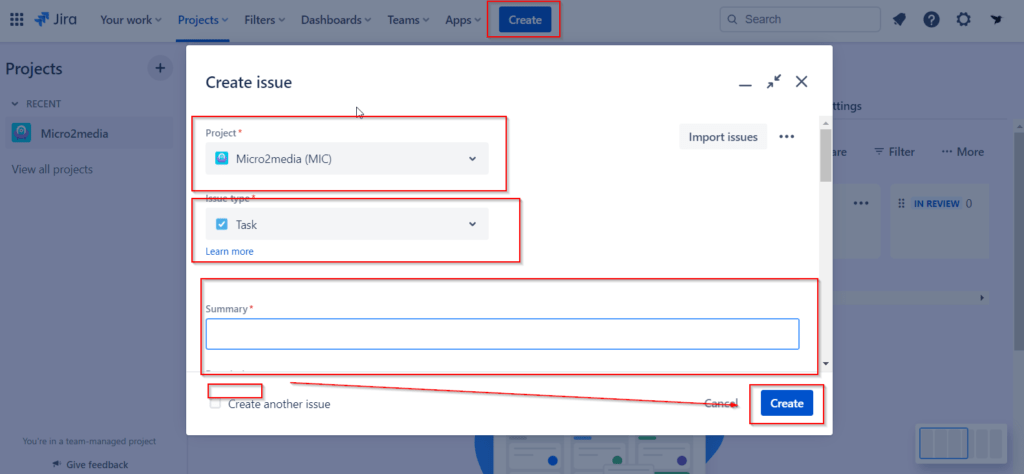
Working with Issues in JIRA
Issues are at the heart of JIRA. Hence, an issue can be anything that needs to be tracked or managed, such as a bug, feature request, or task. To work with issues in JIRA, follow these steps:
- Log in to your JIRA account.
- Navigate to your project and select “Issues” from the top navigation menu.
- Click on the “Create Issue” button.
- Select the issue type from the drop-down menu. JIRA supports several issue types, including bug, task, and story.
- Enter a summary and description of the issue.
- Assign the issue to a team member.
- Set the priority and due date for the issue.
- Add any relevant attachments or comments.
- Click “Create” to create the issue.
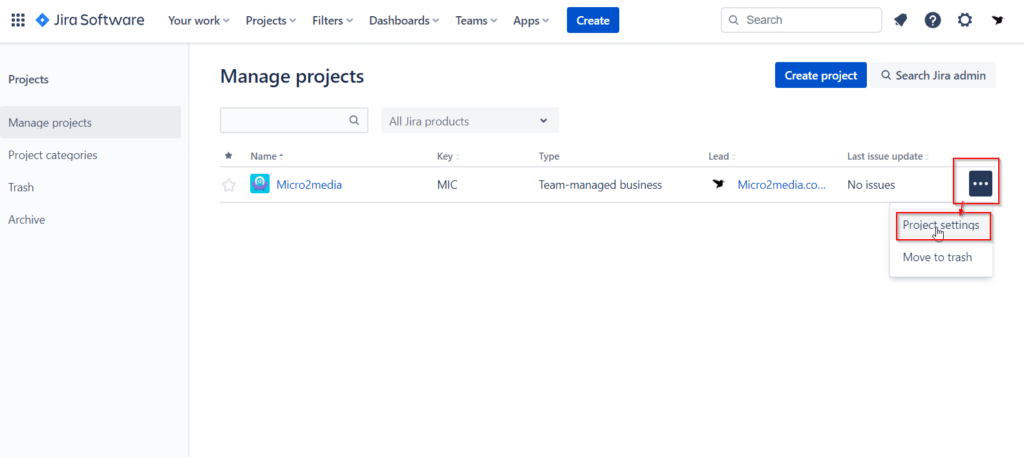
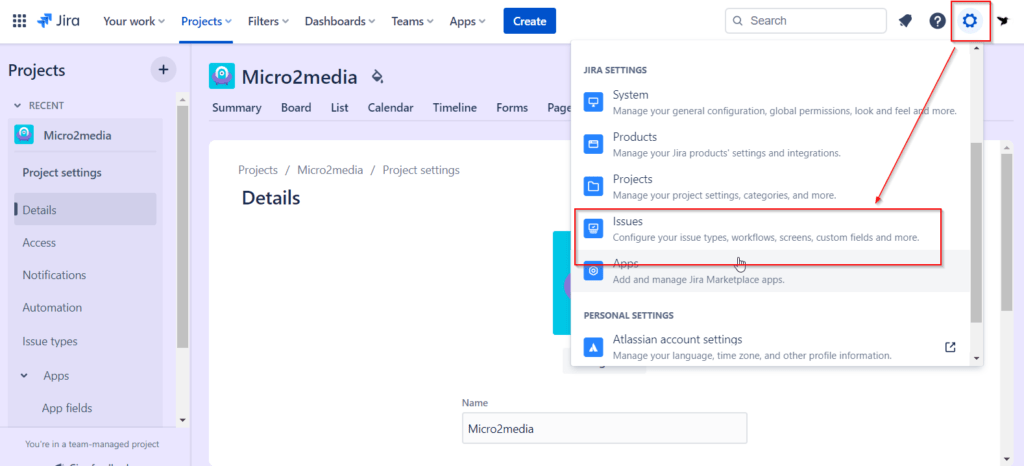
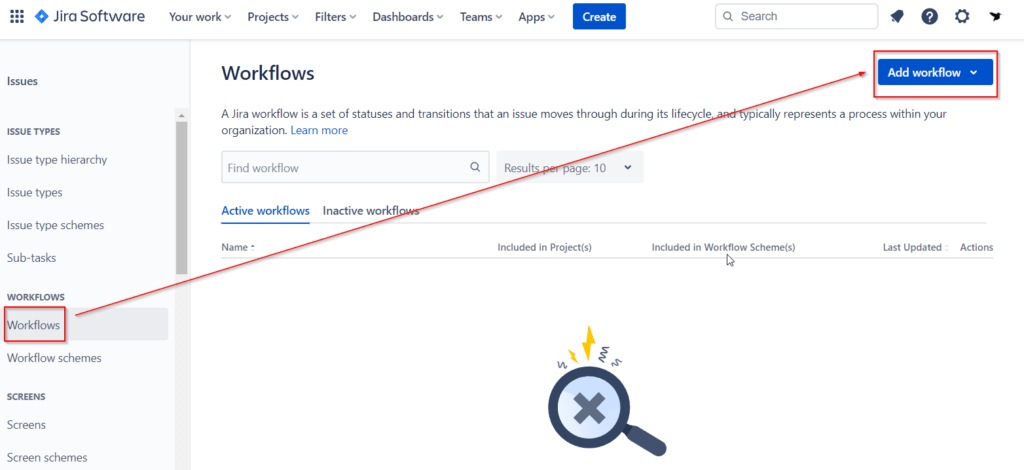
Managing Workflows in JIRA
Workflows are used to define the status and transitions of issues in JIRA. As a matter of fact, a workflow can be customized to meet the needs of your team or project. Also, to manage workflows in JIRA, follow these steps:
- Log in to your JIRA account.
- Navigate to your project and select “Project Settings” from the top navigation menu.
- Click on “Issues” to view the issues settings.
- Click on “Workflows” to view the list of workflows OR to create a new one.
- Select the workflow you want to edit or create a new workflow.
- Customize the workflow by adding or editing statuses and transitions.
- Assign the workflow to your project.
- Configure your project settings to use the workflow.
- Click “Save” to save the workflow.
Using Agile Boards in JIRA
Agile boards are used to manage and track work in agile software development. Indeed, JIRA supports several types of agile boards, including Scrum and Kanban boards. To use agile boards in JIRA, follow these steps:
- Log in to your JIRA account.
- Navigate to your project and select “Agile Boards” from the top navigation menu.
- Select the type of agile board you want to create.
- Configure the board settings, such as columns, swimlanes, and card layout.
- Add issues to the board by dragging and dropping them onto the board.
- Use the board to manage and track your work, such as sprint planning, backlog grooming, and team collaboration.
Best Practices for Using JIRA
Customize JIRA to Meet Your Needs
JIRA is a highly customizable tool that can be tailored to meet the needs of your team or project. Take the time to explore JIRA’s settings and configurations in this JIRA trainings, to ensure that it is set up to work the way you need it to. Furthermore, you can customize JIRA’s workflows, issue types, fields, and screens to match your team’s processes and requirements.
Use JIRA’s Reporting and Dashboards to Monitor Progress
JIRA’s reporting and dashboard features are also powerful tools that can help you monitor your team’s progress and identify areas for improvement. Use JIRA’s built-in reports, such as burndown charts and velocity charts, to track your team’s progress during sprints or over longer periods of time. Create custom dashboards to provide an overview of your team’s work and performance.
Collaborate and Communicate Effectively
Effective collaboration and communication are key to the success of any project. As a matter of fact, JIRA offers several features that can help your team collaborate and communicate more effectively, such as commenting, @mentions, and notifications. Moreover, you can use these features to keep everyone informed and engaged in the project.
Use JIRA’s Agile Boards for Scrum and Kanban
JIRA’s agile boards are an excellent tool for managing work in Scrum and Kanban methodologies. Hence, use the boards in the JIRA trainings, to visualize your team’s work, track progress, and identify issues. Agile boards can help your team stay organized and focused on the most important tasks.
Keep JIRA Clean and Organized
JIRA can quickly become cluttered and difficult to use if it is not kept clean and organized. Hence, encourage your team to regularly clean up and close out old issues. Use JIRA’s search and filtering features to quickly find the issues you need.
Examples of Using JIRA trainings
Here are some examples of how JIRA can be used in different scenarios:
- Bug Tracking – Use JIRA to track and manage software bugs. Create issues for each bug and assign them to team members. Use workflows to track the status of each bug, such as “New,” “In Progress,” and “Resolved.”
- Agile Software Development – Use JIRA’s agile boards to manage work in Scrum or Kanban methodologies. Use the boards to track sprint progress, prioritize backlog items, and collaborate with team members.
- Project Management – Also, use JIRA to manage and track projects from start to finish. Create issues for each task and use workflows to track their status. Use JIRA’s reporting and dashboard features to monitor progress and identify issues.
- Service Desk – Moreover, use JIRA to manage and track service requests from customers. Create issues for each request and use workflows to track their progress. Use JIRA’s commenting and notification features to communicate with customers and keep them informed.
In Short
JIRA is a powerful tool for managing projects, tracking issues, and collaborating with team members. By following best practices and customizing JIRA to meet the needs of your team, you can streamline your workflows and improve your team’s efficiency. Use JIRA’s reporting and dashboard features to monitor progress and identify areas for improvement. With JIRA, you can take your project management and issue tracking to the next level.
If you need assistance with real-life scenarios or recommendations, please feel free to contact us either HERE or through email at trainings@micro2media.com.